Learning 2d animation

General / 22 February 2021

Recently i've been very impressed by the stuff people have been doing with Blender's grease pen. So i decided to give it a try. Here area some test.

My very first animation! 


Followed by a more cleaner, more traditional animation, this time using the "animator's survival handbook" as a guide as i read through the chapters.


Finally, since i had a nice blockout of the animation i decided to convert into a bouncy slime ball..why not?! 


Low Poly Workflows

General / 24 February 2020

Published a new video series on gumroad, briefly explaining how i approach low poly. Expanding on the last tutorial. Goes over how to prepare assets for baking in marmoset with consitant pixel rations and a few other tips for handleling the entire process.

Check it in gumroad! :)


Sub D Modeling Techniques

General / 02 February 2020

Its been a long time coming, but i finally set up my gumroad. Hopefully if people like the videos i am selling, i will continue the series. 

The first one is about a general overview of subdivision modeling. Using maya, also included is my own marking menu with macros for creasing.


Procedural Chipies with Houdini!

General / 10 January 2020


Been playing with Houdini for over a year, silently lurking forums and trying to get the hang of it. I wanted to share this, but also encourage everyone out there to let go of your fears and try it out! If you are an artsy artist and already know how to use Designer you are half way there!. 

This is not a tutorial, is simply me sharing what I've found Houdini useful. By no means am I trying to go full procedural. Instead just showing how i use the tool to speed up my workflows. Specially because I usually work on more organic environments. Where procedural might not always look great.

 Often you cannot hear "Houdini", or "procedural" without bringing a bag of mixed feelings to the party. Some might say that it will take jobs away. Others are just simply completely intimidated by it, because they might need to use "math". I am here to tell you that this is not rocket science, is a 3d app!! Is a very complex tool with which you can create anything you imagination desires! That is the key word here is "tool". The secret here is to understand that first you need to learn how to crawl, before you can walk. Because only then you will be able run!

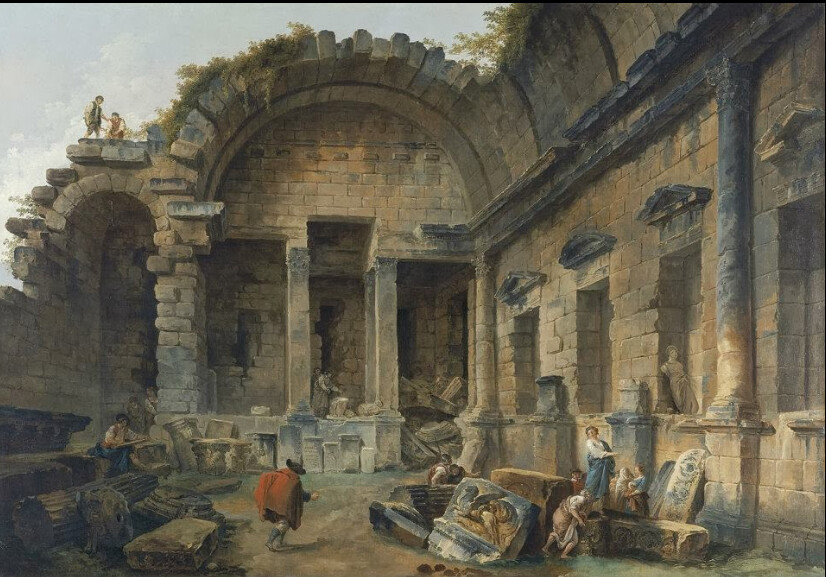
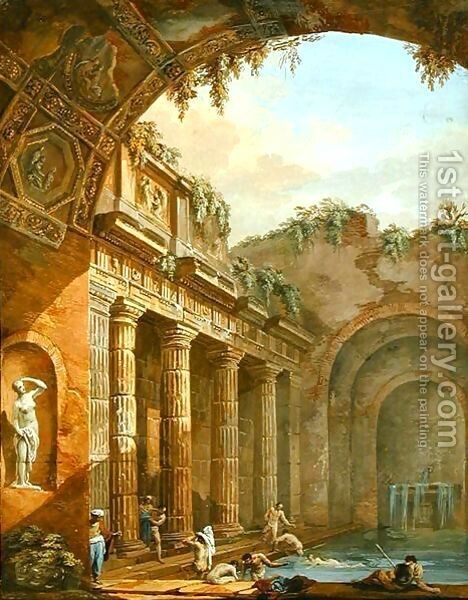
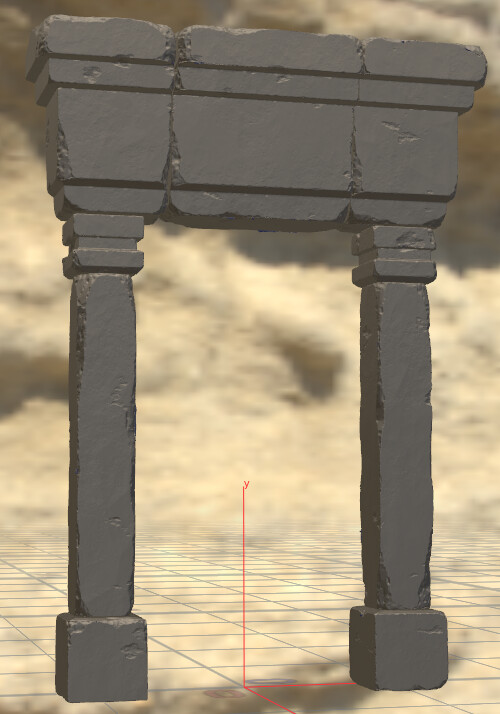
My goal here is to create a tool that i can feed meshes that i already blocked out in maya. Meshes that are also part of an unreal scene. All that is left is to do the usual, sculpting, low poly, texture thing. 

 At first i thought, that maybe i could see if i could randomize the bevels at least, but it went much much further than that. In the end the digital asset set me up for a very solid first pass sculpting. 

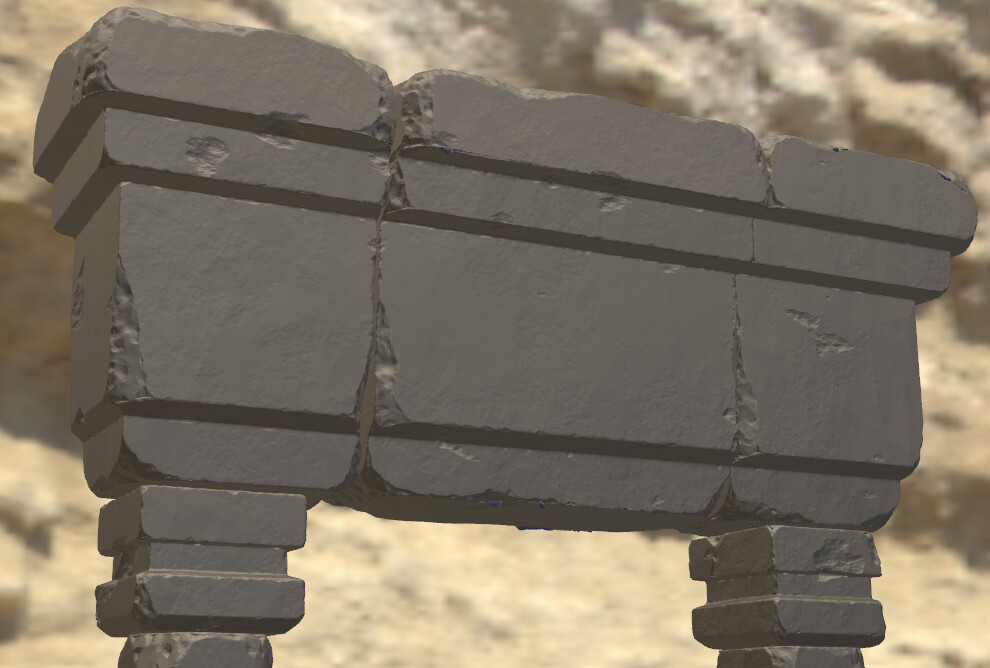
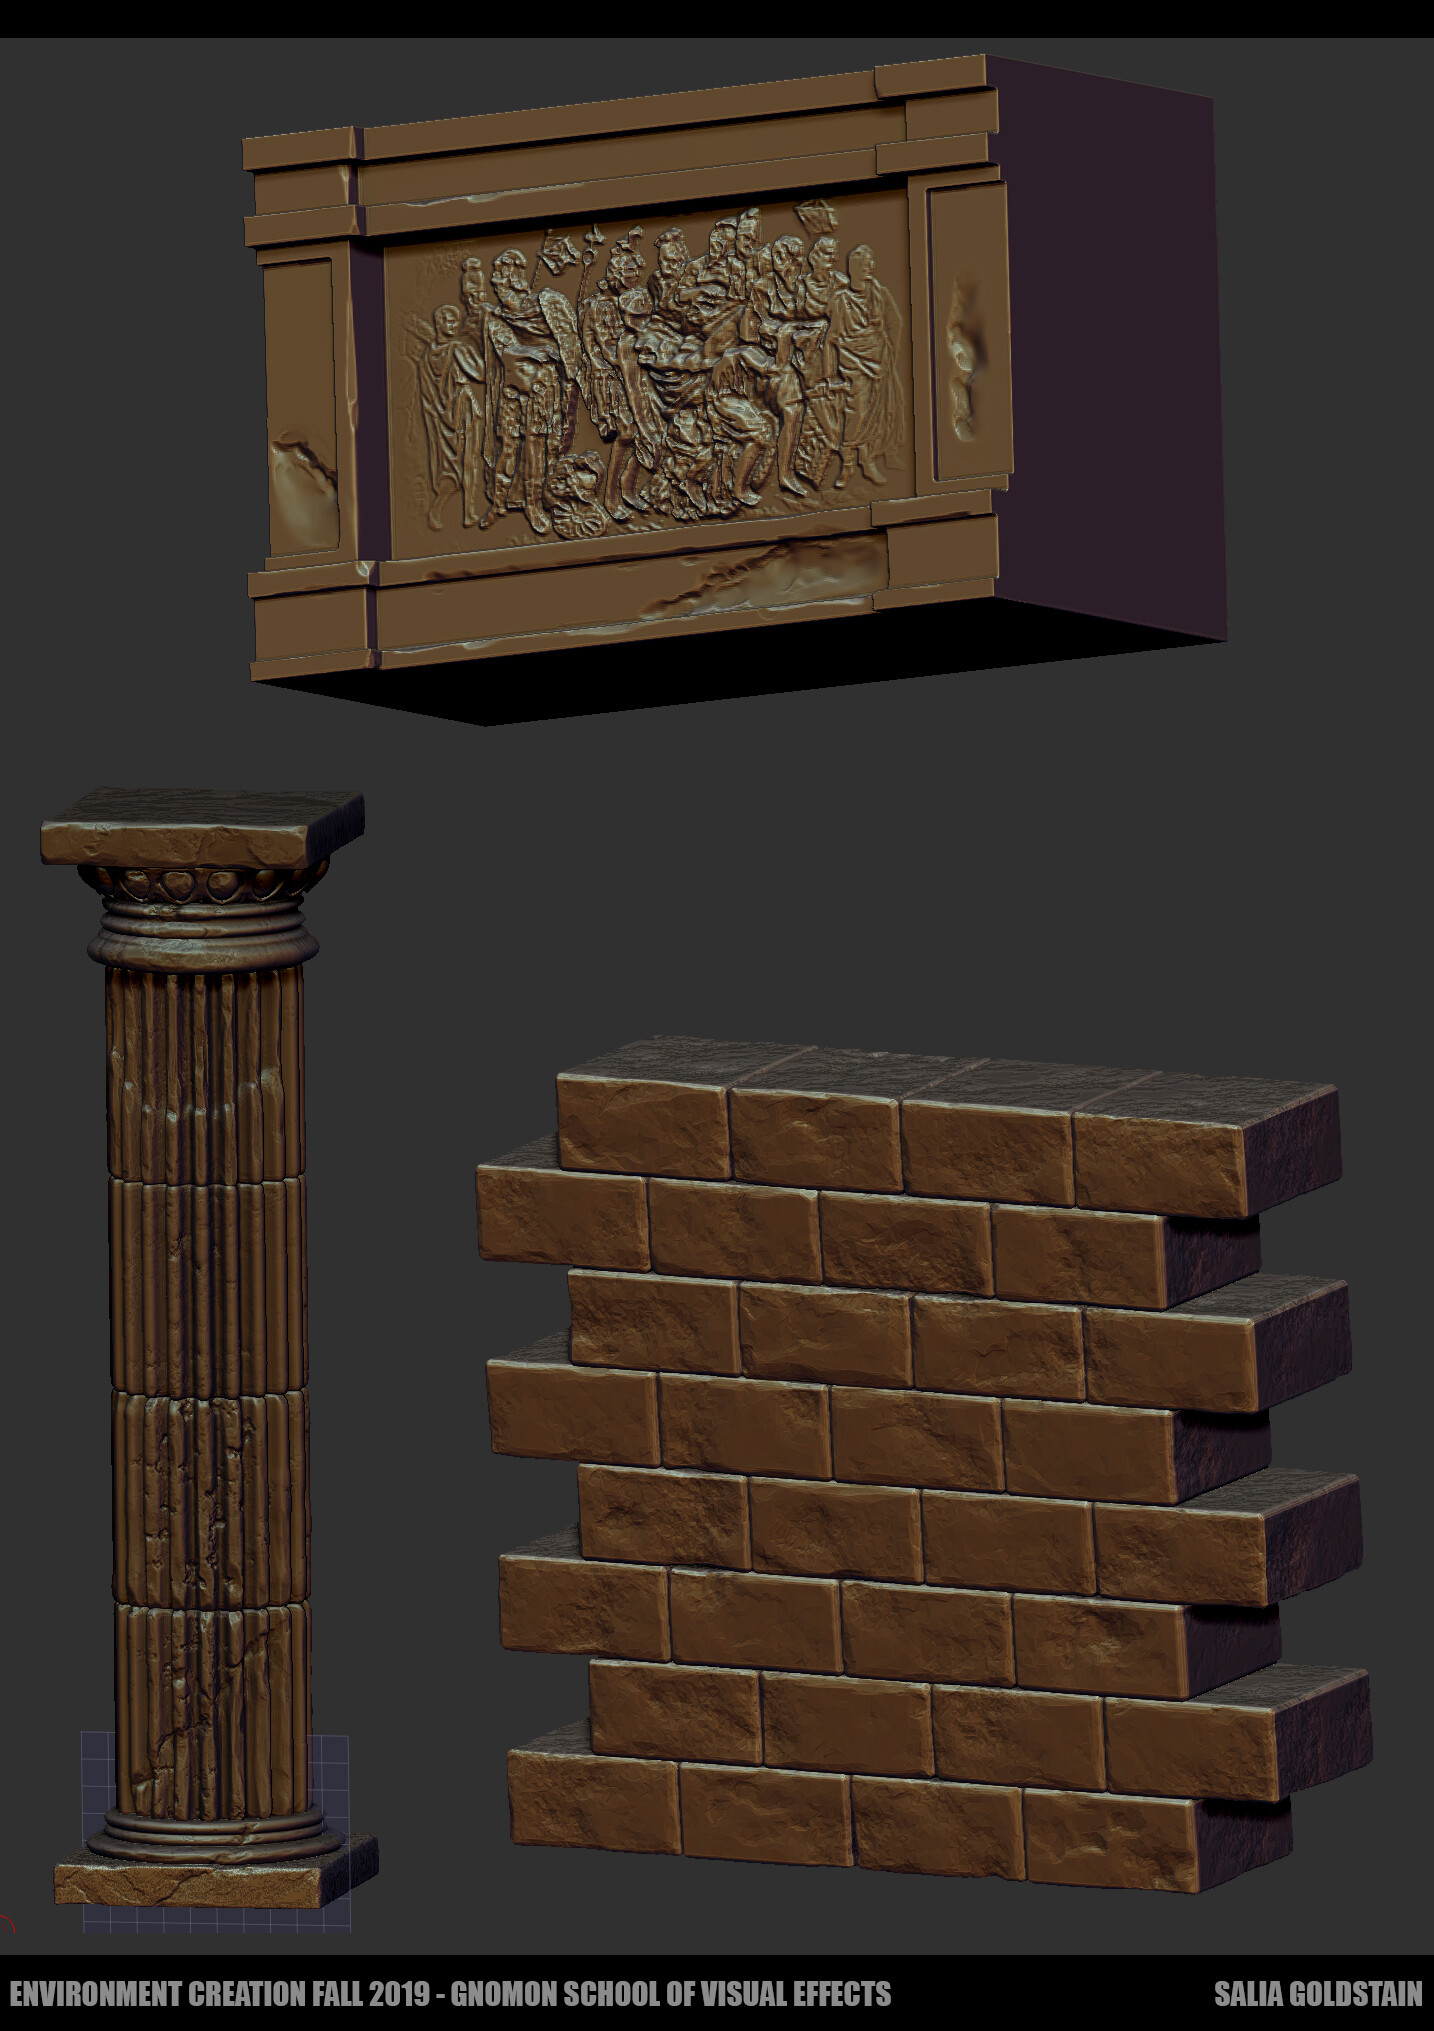
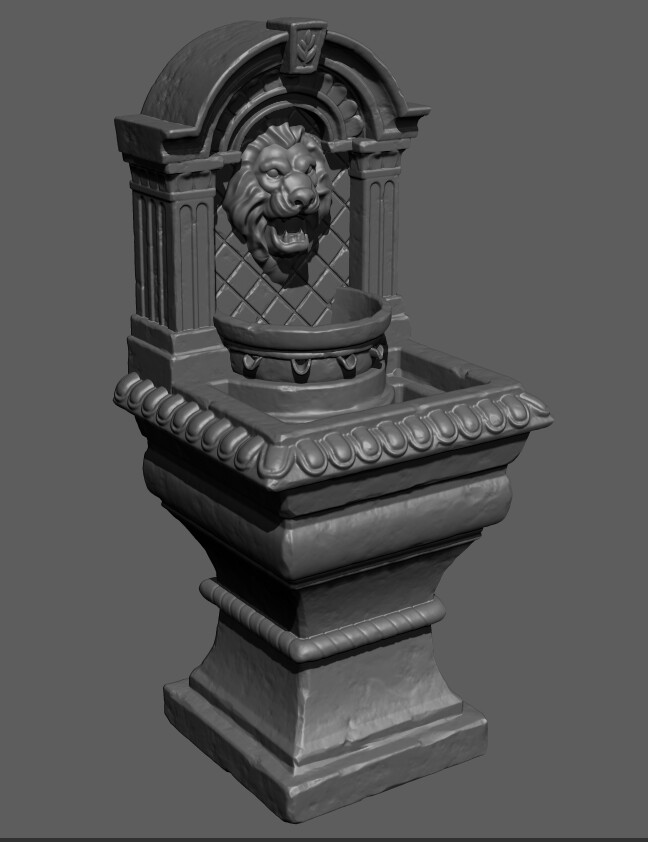
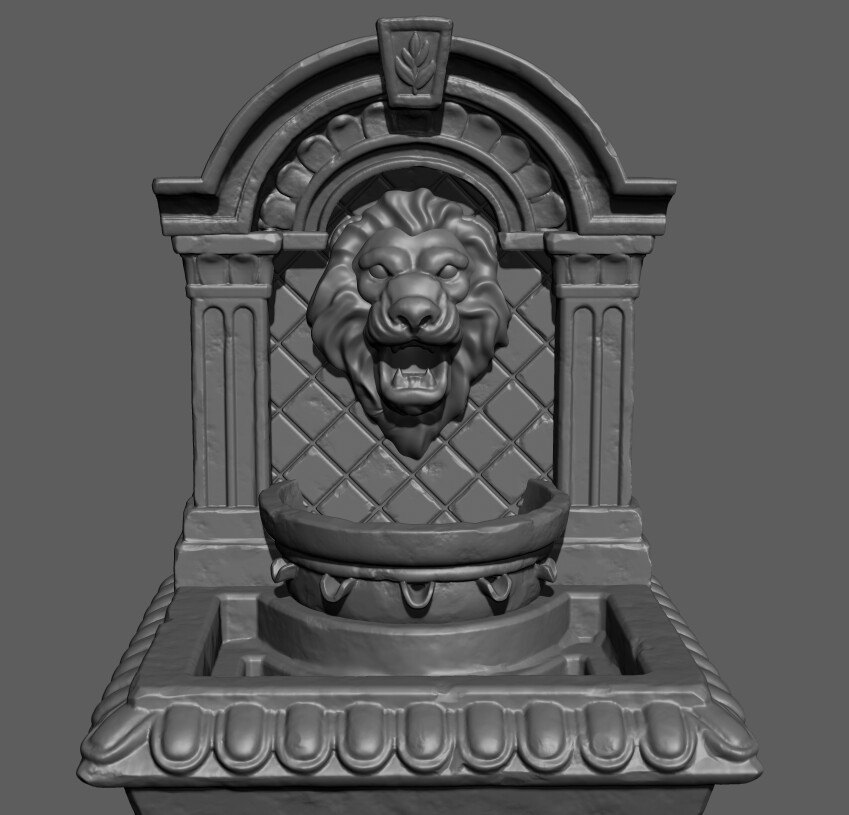
Above is a simple blockout mesh, imported from maya. Below is the mesh after the digital asset takes cares of adding chisels and other damage. Since i am very picky about the sculpting part, i made peace with the fact that the chisels are only going to look this good. For most people this would be good enough. But for others, like myself, i would like to give this a second and final pass of polish by hand in zbrush. 


I know some people are going to start asking me what is this madness?! And can you make some tutorials?! I will eventually, but honestly this stuff is so so basic i dont think i will. However, i will share below screenshots of my graph to give you an idea of how to go about setting up something like this. Specially if you are new to houdini and you really wanna get in there and do some magic!

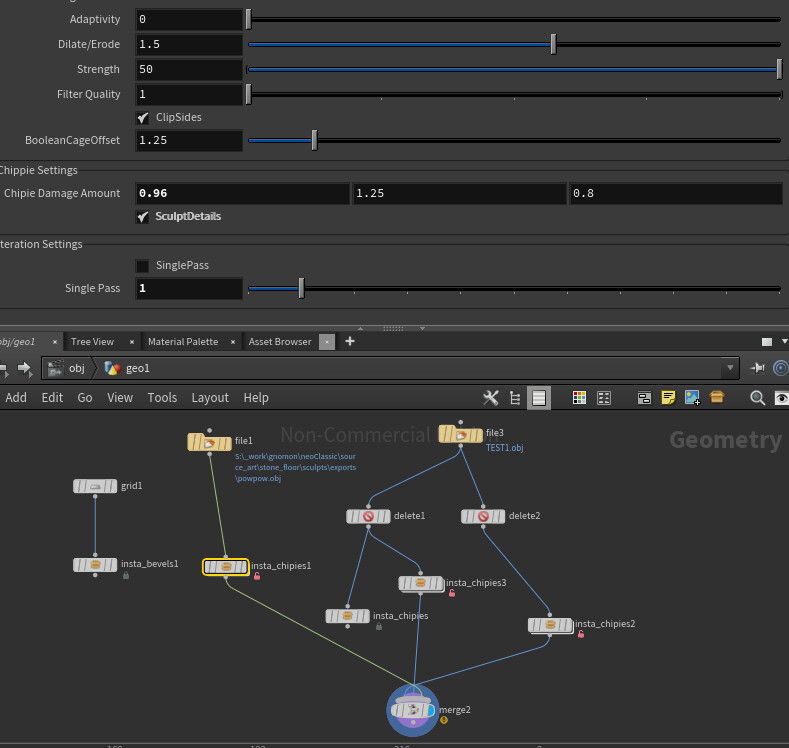
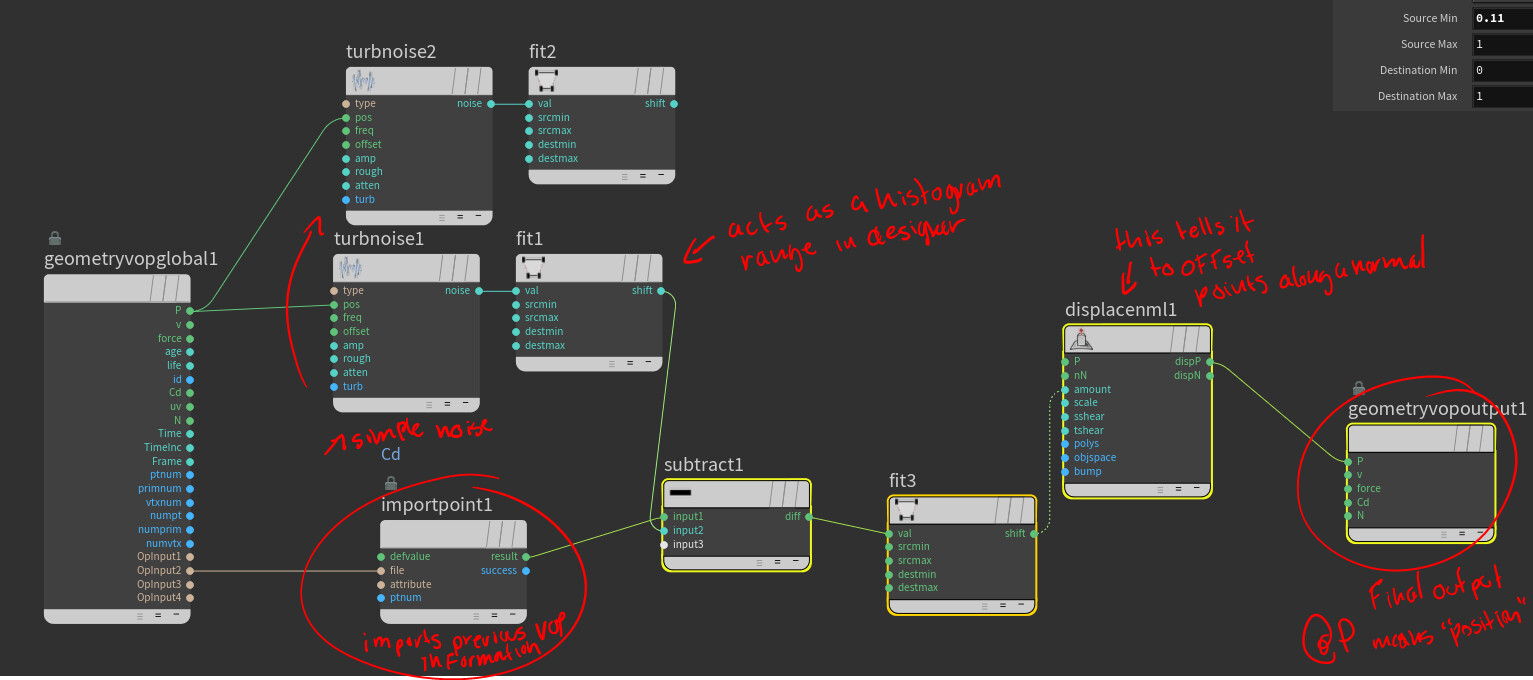
This is what my main graph looks like. Is just a couple of nodes. The node doing all the work, is a digital asset called "insta_chippies".

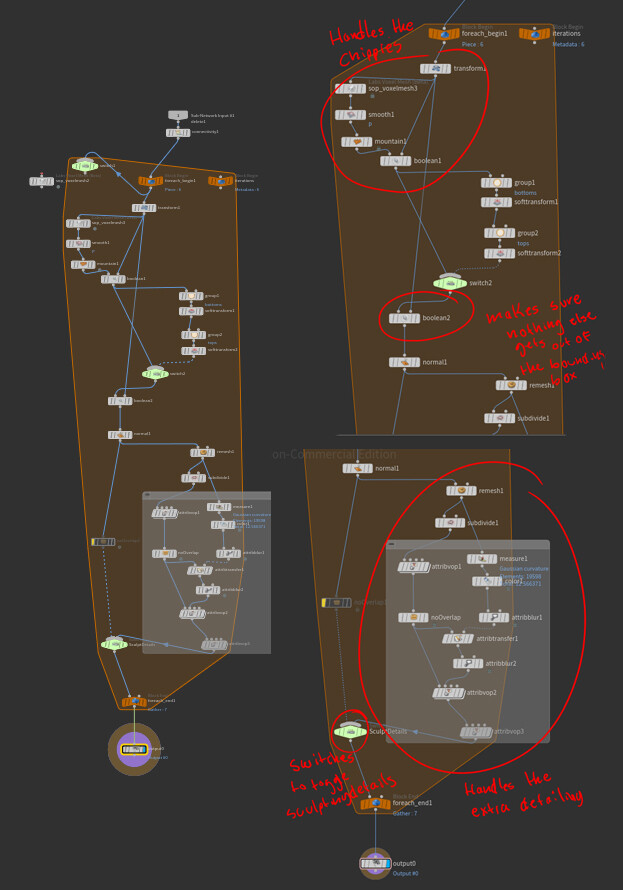
If we take a look inside, we can see that is doing quiet a number of things.  There are sections for handling the "chippies". Then there is another section for subdiving the mesh and adding surface detail. In between all this there are switches that toggle certain parameters. Below are also VOPs nodes, which is houdini's procedural surfacing system, similar to substance designer. 

This is what things look like inside a VOP attribute node. This is a very simple network of noises. 

So how do i know how todo all this? I usually write it down on a piece of paper. And then i go one item at a time. Until things start to look like what i would do by hand. Houdini is super technical. There is no denying that, but with a little bit of patience and a lot of imagination the sky is the limit!

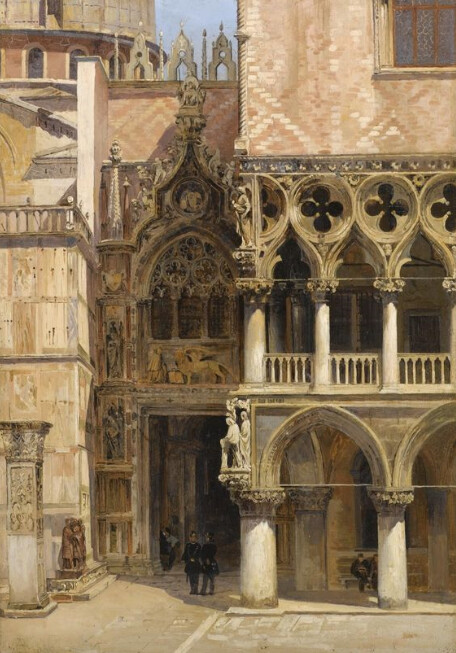
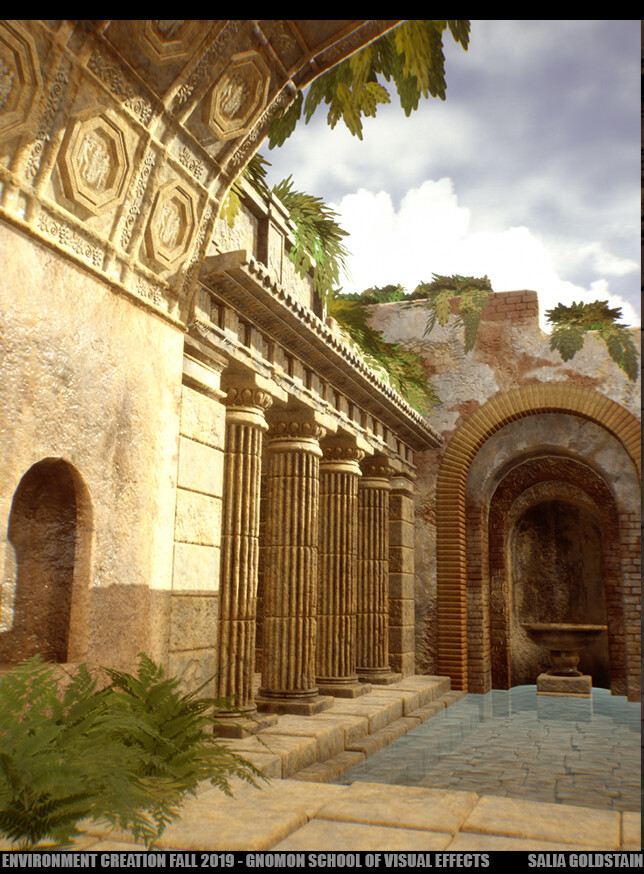
Below is a screenshot of simple stone floor mesh i imported from Maya. I then instantly get the bevels and chisels. Which could be used as is with a tillable texture if you are doing a very stylized game. Or in my case you could take it a few steps further and add more details. 

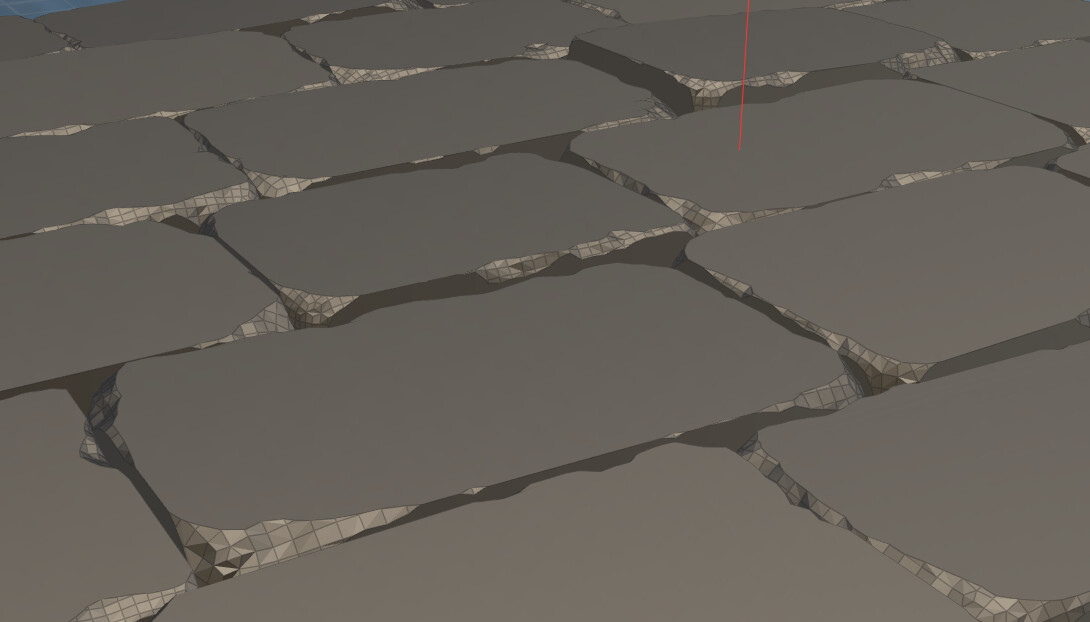
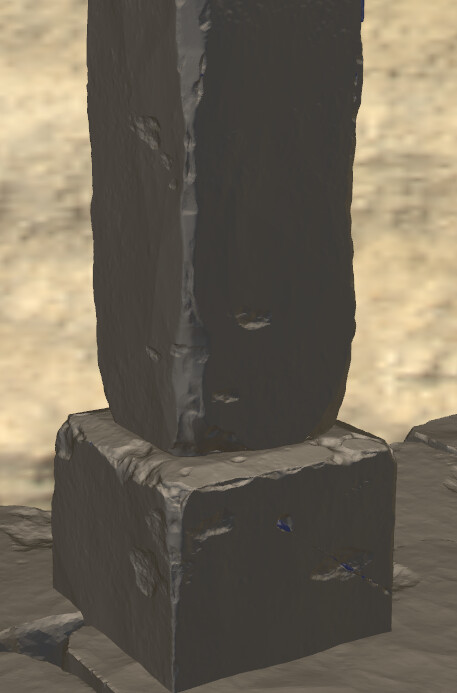
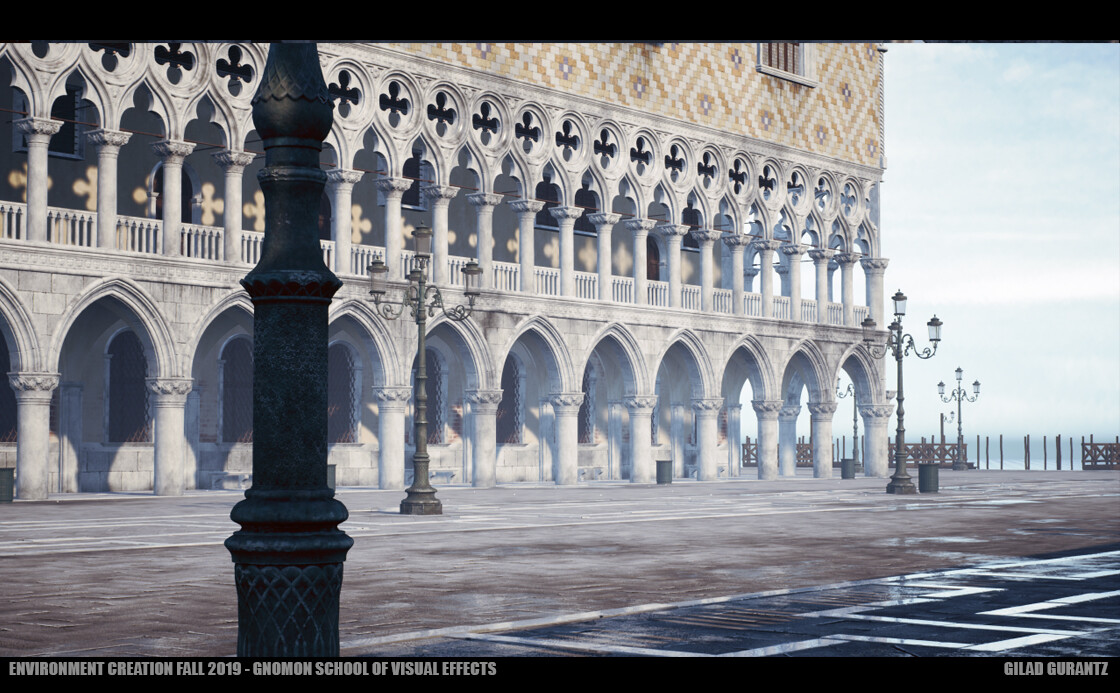
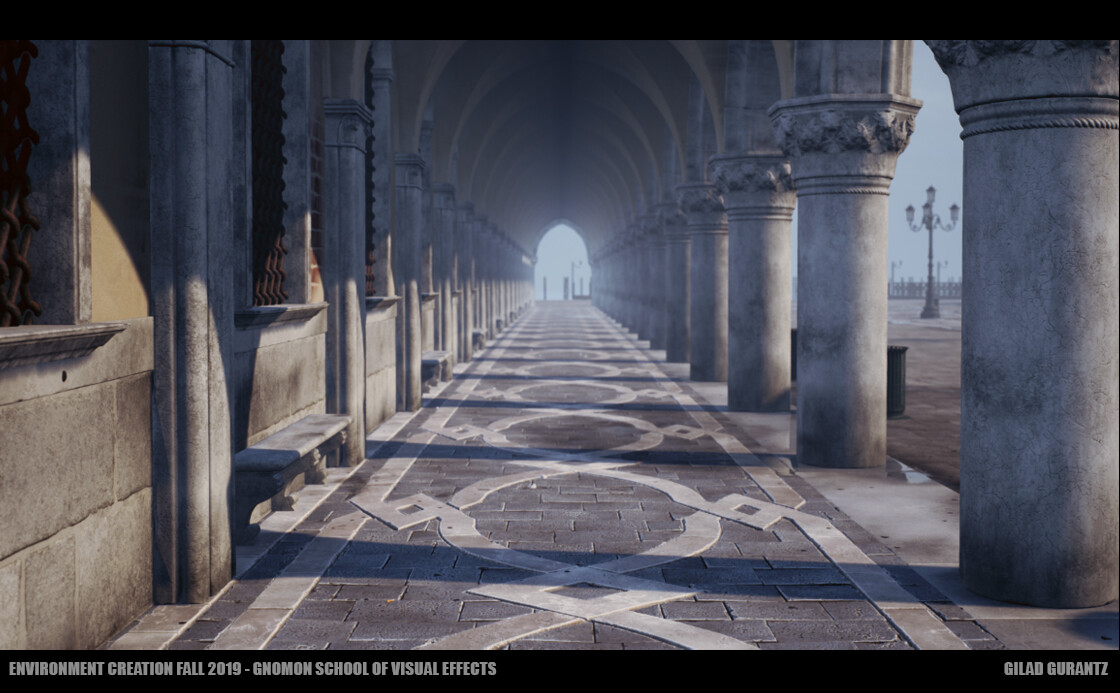
Below, i activated the second part of my graph to allow the meshes to become subdived and retopologized so that it can support the displacement data coming through. Just like zbrush, where you need to subdivide your mesh if you want more detail. As you can see a lot of this looks pretty heavy handed and random at times, this what i dont like about proceduralism. However remember, this is just a first pass and you can take things further by hand if you need to. There is no need to try to do it all procedural. Mix things up a bi!


 Houdini also comes with something called the houdiniEngine, which plugs in directly to maya or unreal4. Which means that within maya i could apply all the chippies and surface detail. Then send it to zbrush! It is a brand new and exciting world of possibilities! 

Final Student Work for Environment Creation Class Fall Term 2019 @ Gnomon School.

General / 05 January 2020

I had the pleasure to teach my third  eleven week course of Environment art creation at the Gnomon school. The class covered a lot of the basic techniques of blocking out a level and taking it to completion. I am very pleased with the work my students were able to accomplish. So much, that i wanted to share them below and give them a bit of spot light! 

Each student was completely responsible for their environment. They picked from a pool of reference i gathered, the main theme was neo classical architecture. They were fully responsible for creating everything from scratch. Using maya, zbrush, marmoset, substance designer and painter, and finally put it all together in Unreal.  It was an overwhelmingly amount of work for eleven weeks. I am so damn of proud of them!

Please note that these might not be the final product. I am also not sharing the entire breakdowns of their scenes.


  Miriam's main focus is to learn how to create vr simulations of microscopic environments for her own medical studies. Unfortunately i dont have more screenshots handy. She had scans and sculpts of all her assets, and even though is hard to tell this environment spirals for miles and miles. Seeing this come together was very interesting and inspiring! 


Sculptember??

General / 16 September 2019

Sculptember is one of those things ive been wanting to do for the last few years. Truth is, i already do too much at work. And am trying to have better healthy habits out of work. But.. im gonna try to jump in the bandwagon and do a recap each week. 


The Well


Final Student Work for Environment Creation Class Spring Term 2019 @ Gnomon School.

General / 27 June 2019

I had the pleasure to teach my first class for the past 11 weeks at the Gnomon school. The class covered a lot of the basic techniques of blocking out a level and taking it to completion. I am very pleased with the work my students were able to accomplish. So much, that i wanted to share them below and give them a bit of spot light! 

Each student was completely responsible for their environment. They picked or created a concept, and creating everything from scratch. Using maya, zbrush, marmoset, substance designer and painter, and finally put it all together in Unreal.  It was an overwhelmingly amount of work for 11 weeks. I am so damn of proud of them!


Please note that these might not be the final product.

Rhiannon Remo

Jeff Smith

Brandon Mays

Eli Hurst

Brandon Fox

Austin Singgin

Eric Roin

Pi Barlett

David Majchrowicz

Jan Cauton


Blocking out Shapes : Part 4, making low poly

General / 05 June 2019

There are many ways to go about making a low poly. The only way that is the right way, is defiantly what works best for you! However in some case, is definitely worth exploring new ways of making things. Specially if you are short on time and have a lot of low polies to build. This video focuses on creating the low poly for an organic architectural modular piece. 

The goal here is to make sure that the low poly retains all the silhouette from the high poly. And that it looks just as good, if not better than the high poly.  For that purpose i am starting using a decimated version of the sculpt, using the decimation master in zbrush. And then manually cleaning the model.  

This is bit of a tedious process. For which is handy to do a few things to speed things up. By using hotkeys, i go into full autopilot mode and clean  through the model very quickly. In this video i am using a lot of my custom scripts. For this sort of thing is important to understand that we only are interested on keeping the edges of the decimated version, anything else that is not helping the silhouette on the model, such as flat surfaces are going to be cleaned up, reduced and treated properly.   I do a lot of this with vertex painting in mind. One thing i did not do a lot of are "test bakes". The only way you will know if you are reducing the model properly is by trying out test bakes. You bake your normal map, and you keep reducing. Rinse and repeat. It is also a good practice to have some version of the high poly decimated in the scene to help you see what needs to be constructed and kept intact.

I also want to mention that i am not a fan of jumping between programs too much.  Which is why ive developed such a strict way to build these low poly models all within maya.


Blocking out shapes, part 3. Sculpting!

General / 31 May 2019

Hello, sharing part three of my series covering blocking out evironment assets. This video covers a very quick glimpse at my sculpting techniques. Because of how I work, I usually tailor my assets main shapes in Maya by adjusting them for what I see in the game. Rather than going to zbrush first and commiting blindly to random shapes. Sometimes what might look "cool" in zbrush might not work well ingame for your level. Because of this a lot of times I would sculpt and play with shapes briefly in zbrush. Decimate that model, and throw it in the game to see how the shapes play with the lighting and the overall feel of the level. This process is very handy when making organic models such as rocks. This part of the process is very repetitive. A lot of the times I would tweak the decimated model in Maya using lattices. I will have to make a post about this later. 

I only commit to my detailed sculpts when I know the model works well in game. 

Other tips as seen in the video:

1. Make sure to use a material that highlights the detail in your mesh. Similar to how people flip the canvas while drawing in Photoshop. I constantly toggle between my main sculpting material and the a gray shiny material.

2. Brushes and alphas are very useful. However, force yourself to learn how to sculpt surfaces by hand first. So that you understand what needs to be done.

3. Pay attention to your reference!

4. People will argue that you don't have to put detail on your mesh because you could do overlay materials. Which is valid. That is no excuse for your sculpt to look soft and cartoony. All the detail of your sculpt will eventually transfer to your normal map. And more likely other maps that you will use to create the texture. A lot of the times you might find yourself going back to the sculpt to tweak things. To make the texture part work better for the kind of mesh for what your doing. So wether you are doing something stylized or realistic make all the resolution, and details count towards your goal. 

5. Workout the main shapes first. Then add the detail.


If you like my videos, please don't forget to subscribe to my YouTube channel! 


Blocking out Shapes Part 2 Pixel Ratio

General / 22 May 2019

Understanding that working on the grid goes beyond simply making models snap together, is very important. Using the grid we can establish solid texture ratio rules. Sometimes build whole workflows around this concept. This is the second part to "blocking out shapes" a video series i made for my students. In this video i focus on figuring out how im going to treat the uvs for the models i've blocked using 512 pixels per meter. Ensuring that at the end of the day , everything is high rez and consistent!