Height Maps Part One: Tiling

General / 09 June 2024

On this article, I will guide you through the steps of how to create a tiling height map from a sculpt. This not a step by step process on how to sculpt, rather a quick general overview at the process of creating height maps and tiling techniques. The pieces i am demostrating in this article were sculpted in Blender. The fundamental techniques apply on pretty much any software. Specially Zbrush and Maya as that is what i used to do the bulk of this work previously.


I would like to mention that this technique is not new. It is something that other artists I have worked with and myself have used for many years. Its the essence of the method I've used to generate countless presets during over the years. It wasn’t until recently, with the dawn of Nanite in Unreal 5 that suddenly everyone started using height map displacement. This article sheds a bit of light at what my approach is for this workflow. I really hope you enjoy this article and learn something!


What is a height map exactly?


A height map is a 0 to 1 gradient map. 0 being the floor and 1 being the ceiling.  There are many ways you can author height maps these days.   You could draw them by hand, use photoscans, author them with tools such as substance designer. My favorite way is to sculpt them. What matters in the end is the end result. Plus, sculpting is fun!!


What do you do once you have a height map?

The height map gets reapplied to a mesh by either using world space displacement, brushes, etc. Below i've baked the above mesh into a height map and am displacing the mesh with it. Height maps require the mesh to have lots of polygons to be used accurately. The only caveat about them is that they usually just work head on, meaning that the side of the sculpt will be shown flat if it was a perfect 90 degree angle. This is expected as, the height map wouldnt  be able to create geometry that it didnt capture.

How to apply height maps in Blender?

For this specific purpose of displacing the mesh: 
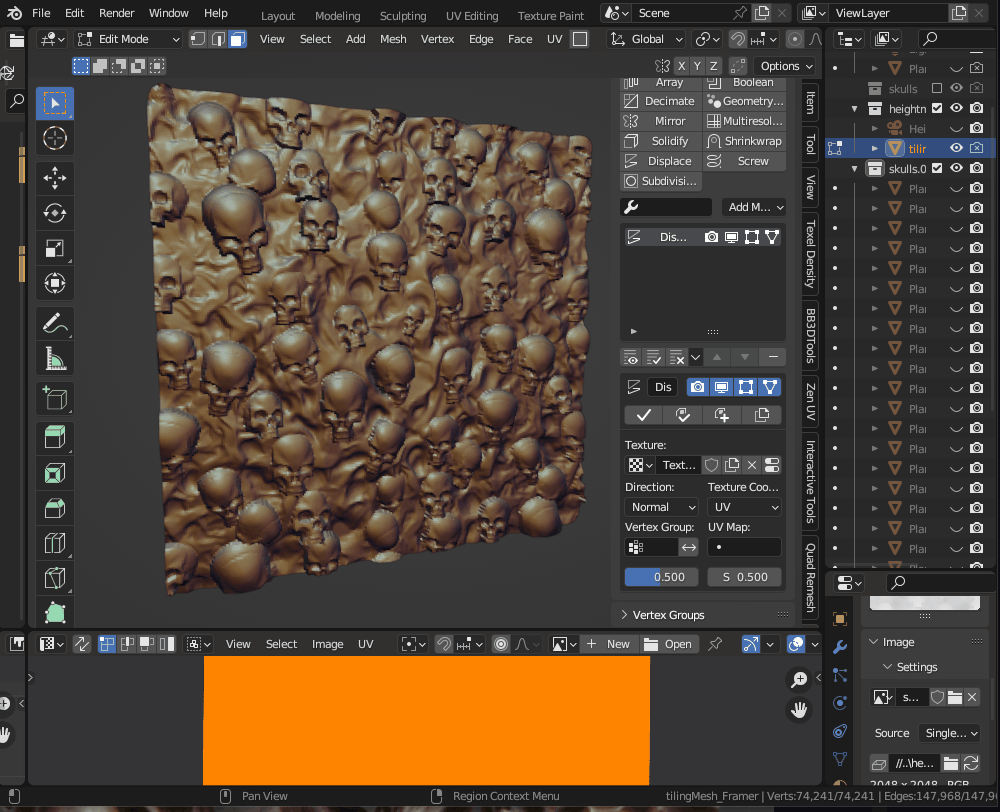
A)You first have to assing a "Multiresolution" modifier to your mesh. This works as a "Subdivision" mode.
B) Assign a "Displace" Modifier to your mesh. Make sure to use uvs as your projection mode. This will make use of your uv map, which you can use to manipulate how the heightmap affects your mesh.


The baking process of a height map merits its own blog post. I will not be covering that today. Lets focus on the tiling aspect of it! I will say however,  that for the most part i author height maps for production doing a combination of things. Somedays i simply do not have the time to figure out a network of ten thousand nodes to create a shape. And so i mix my sculpting skills with substance designer. Once again, what matters is the end result. Feel free to experiment and create amazing work! To re iterate, for this article i sculpted and authored the height maps all using Blender.
Below are the foundations for the rest of my sculpt. I used pretty basic brushes and lots of reference to achieve this. It is very important to create small presets for yourself. These may come in the way of parts extracted from other sculpts, photogrametry. Even geo that has already been displaced using other height maps. 

The surface below was sculpted by hand using the clay brush, move brush and draw brush.


Tiling Your meshes

It is imperative to ensure your height map tiles. Doing so will allow you and others to use it with ease at any time. The fundamentals of tiling your mesh are the same in every program. 
A)First you ensure that your mesh is on the grid.  For the plane surface such as the abstract flesh looking surface on my piece I simply turned on  "tiling mode" on my brushes. In zbrush this is called wrap mode. In Blender this is also part of a brush, and is found under the "Symmetry Tab". In every program you have to set the tiling dimensions of the "tiling mode" of your brush before hand. All of this depends on the size of your mesh. This sculpt was 2x2 meters. Which means that after the 2 meter mark the brush will start tiling.

For quality of life purposes I like to add a buffer edge section of .25 cm to my tiling mesh whichI use every time I start a new mesh. Thisguartees me 100 percent that my mesh will tile. This extra section of the mesh has uvs set so that they tile outside of the quadrant and match their opposite side.

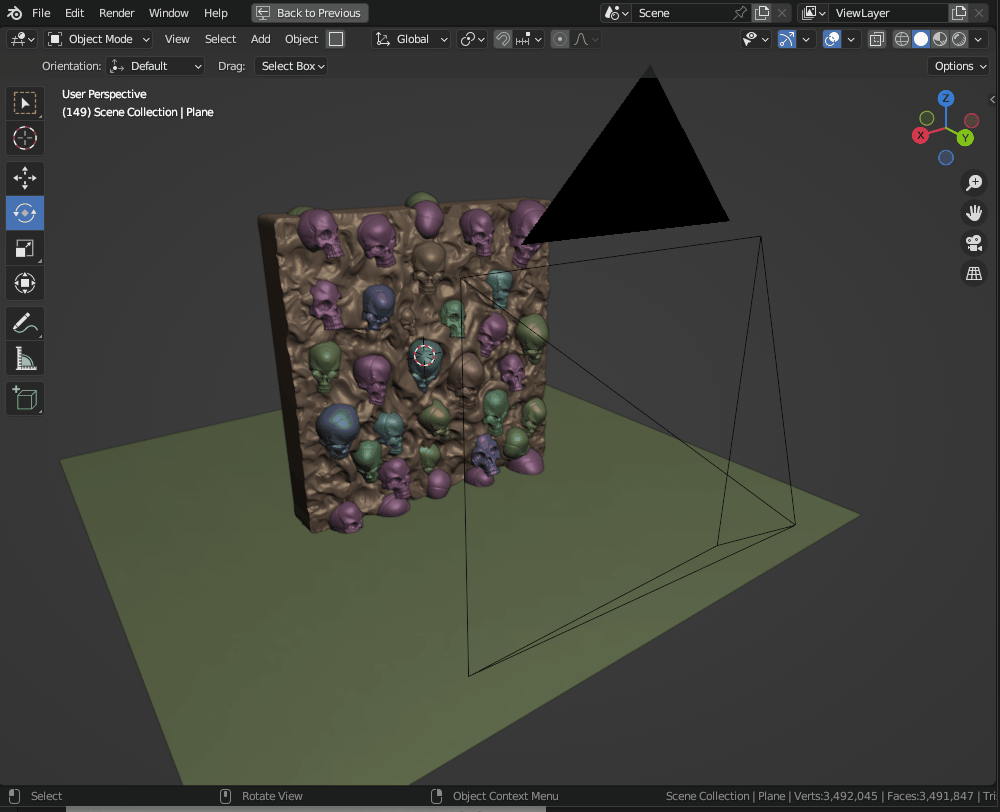
During this process you do not have to make everything one mesh. Infact this works better if you layer lots of objects on top of each other. The skulls are floating on top of the main surface, which i sculpt separate to integrate the skulls into it. Because of this the skulls also need to tile. The tiling of these objects is achieved  through simple math and by using the grid, as well as common sense. And above all, lots of patience.

A)Always start by laying down objects in the center of your mesh.
B)Once things start to come together, then add meshes to the edges of your meshes. And simply duplicate them to the opposite sides. I like to do the right side and top edges first, and then mirror those pieces by hand.

For example, the skulls on the far right, were shifted 2 meters to the left. When shifted they automatically fell at the edge of the tiling mesh. Same goes for the skulls on the top. They were shifted 2 meters down. Often is easy to just add the number of the current location with how much it needs to be shifted.

I cannot stress enough how important it is to keep things on the grid. Not working on the grid will make it much harder to get rid of seams.

This step could also benefit from a simple "geometry node" that looks like this, so that you don’t have to worry about shifting your meshes to the other side of the meshes. However, is always a good idea to know how to do this manually before you get creative and crafty with the process.

Below is the geometry node in action. This behavior is more desireable since it helps you keep the scene cleaner and allows for faster iteration.

Once your mesh has been baked to a height map, the final output looks like this if you reapply it to a simple plane.
While using the Displace Modifier You may tweak the uvs of your mesh to scale or rotate the projection of the height map. I use this method if i need to apply my height map to a mesh uniformly accross its surface. Which is hard to do using simple brushes stamp projections.

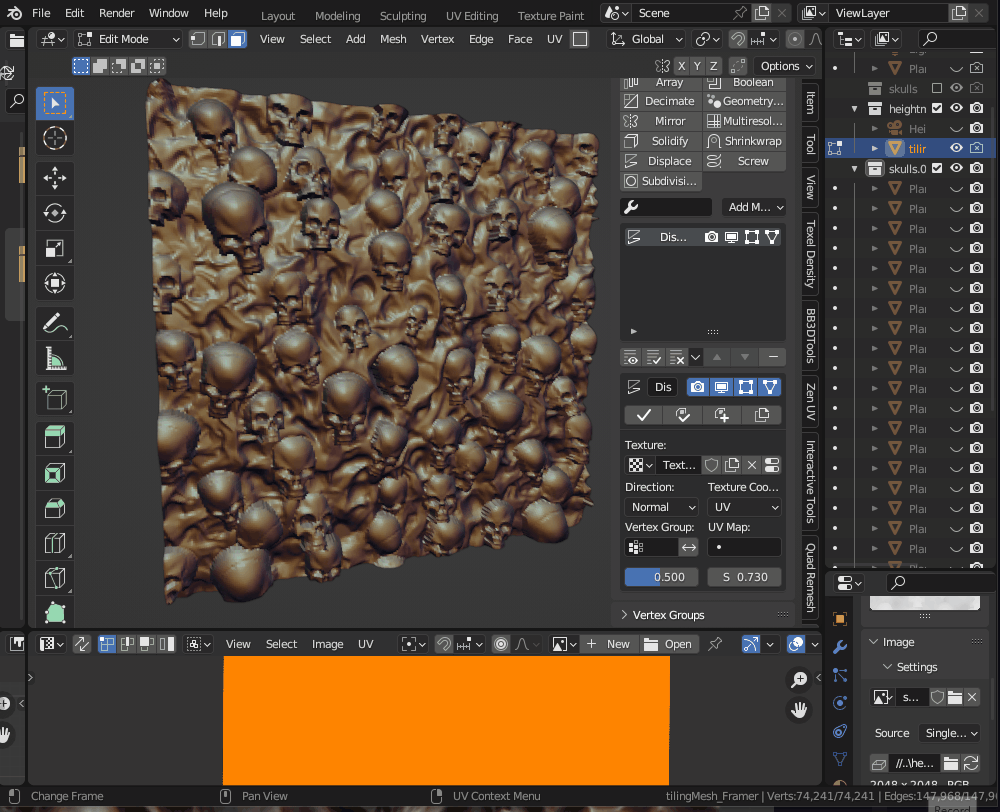
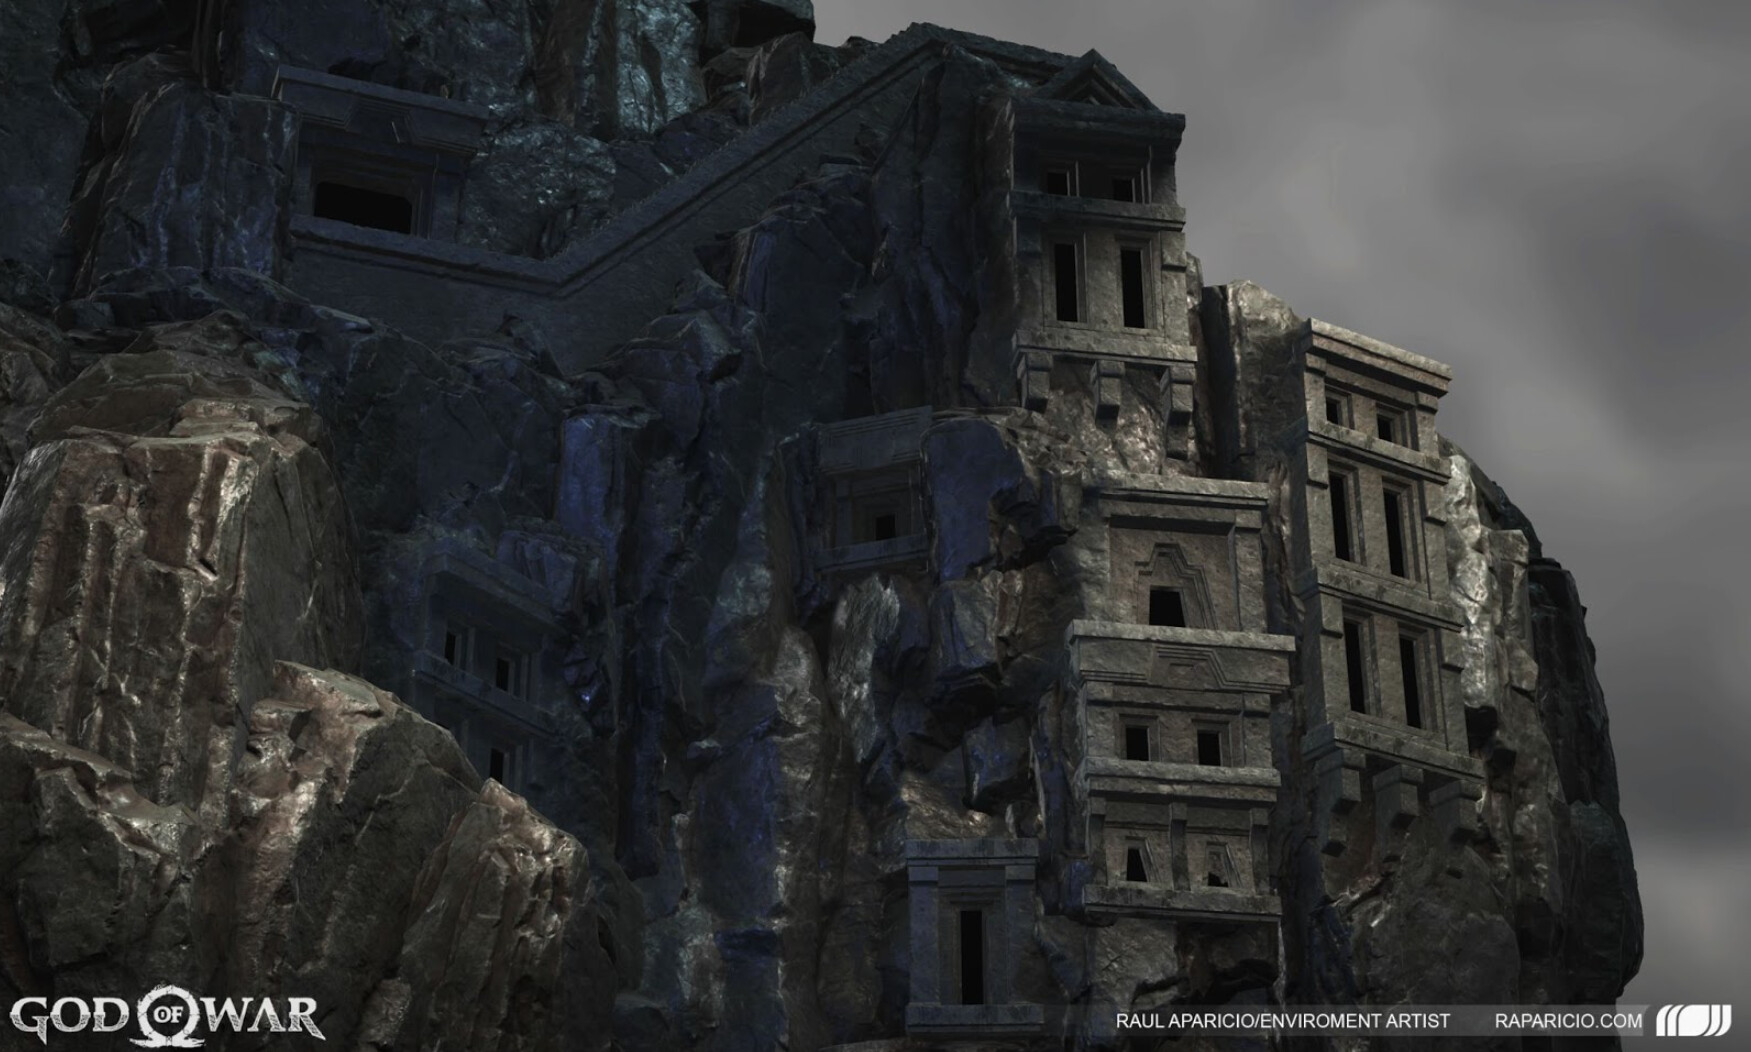
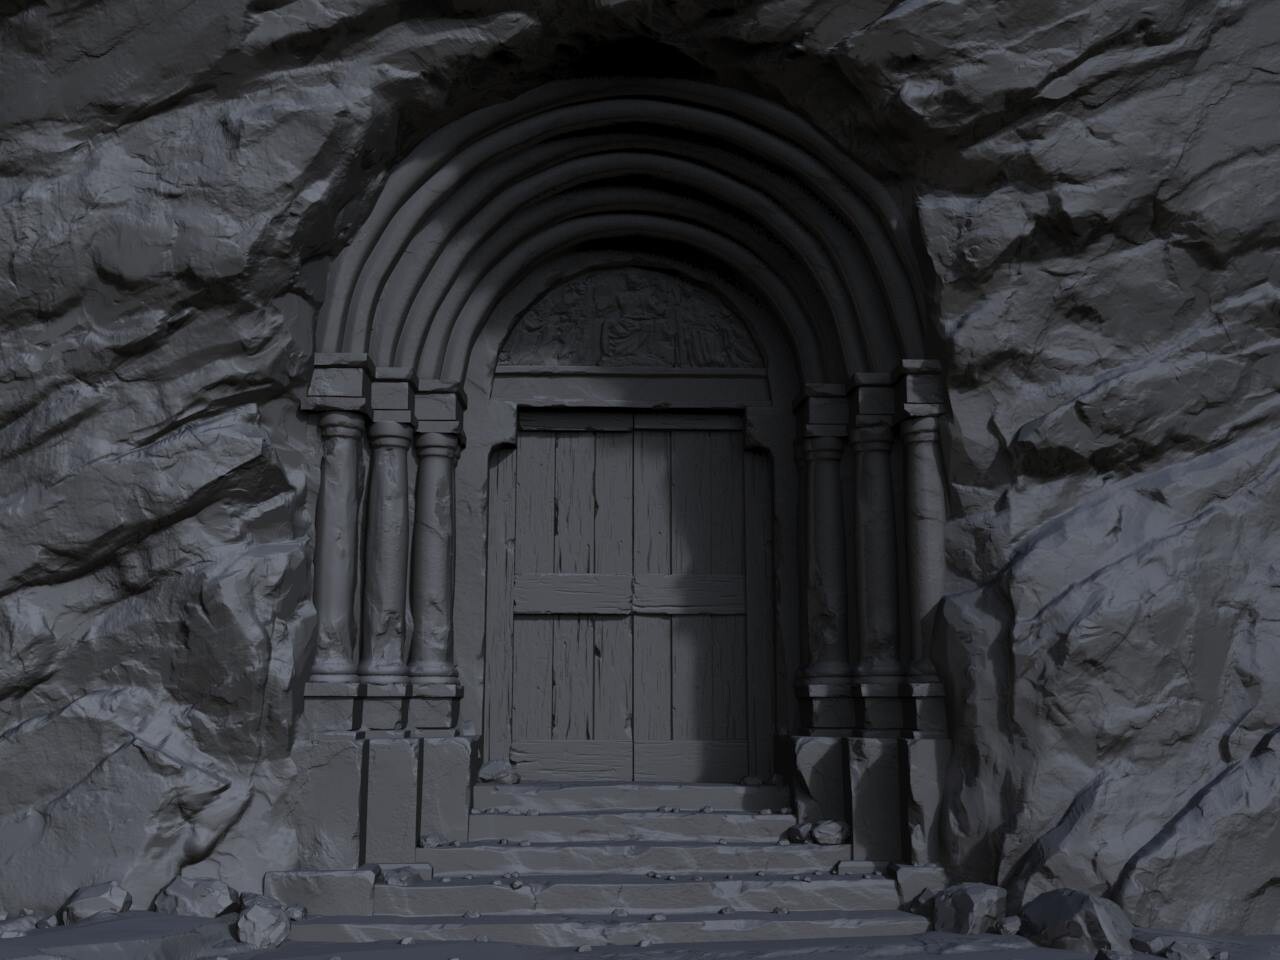
A more pratical use of this height map would be to use on a cylinder, as part of an architectural column.

i hope you enjoyed this article and learned a few things. Part 2 will cover the baking of the height map.


Presenting your art with Blender!

General / 27 May 2024

Presentation is everything! 

As a 3d artist, it is very important to know how to present your work as best as possible! This article covers the basics of the process I use to render my work using Blender.

For many years i tried different ways to do this in multie apps. Maya, Max, Keyshot to name a few.  I cannot stress enough how easy blender does this out of the box. And of course, with a little bit more elbow grease you could take things to new heights. For now lets keep things easy and take a look.

I rendered my recent portfolio pieces for God of War Ragnarok and Jedi Survivor using Blender.

For this article I will introduce you to a piece i made many years ago, that i decided to revive recently. Inspired by a fantasy French artist Batist Monge. I am calling this little guy Mic Mac, and ive made it for the purpose of making it into a 3d print. Which will definitely be part of another article. For now lets focus on rendering in Blender!


In this time and age it has become more common for everyone to know that good ligthing breaks or makes a good photo. We have gone from the old school bathroom selfies, to highly tailored spotlights in front of our screens to present ourselves in the best possible way to our audiences through zoom calls, streams, etc. And of course, lets not forget about all the proffesional photography!


Using a 3 point light rig

The idea is simple, 3 lights ( or more ) to highlight and frame your subject to show all your beautiful crafted details on your models. In the image below you can see how I used what is a called a Key Light, a Rim Light, and a Fill Light.  I also have made a bit of a stage and have set up my camera closed to my subject.

The Key Light, is the main source of light. Its job is to highlight most or all of the details of your 3d model.
The Rim Light, is the secondary souce of light that is will highlight the silhoutte of your model. So that it doesn’t go into total darkness.
The Fill Light( or plural) are there to make sure that your model does not catch darkness. 

All the above are just the basis in which this theory is set up on, and is all personal preference and style as to how they are used. Some people use HDRI as fill lights instead. Other people use more than one keylight. Whatever you do, what matters is that your model gets presented well.

Blender's rendering is almost real time, you get a super accurate preview of what the final output will be in the viewport. As you are setting up your lights you can see what the end result will look like. This is currently using the Cycles renderer which is Blender version of something like Arnold. Blender does also have a real time game engine like renderer called Evee. 

B

But of course results vary with experience. And dialing the values of the lights, and the position of the lights does and can more often take a lot of time. In fact, there might  be times where your models might react different to these ligthing setup and you will have to tweak the ligthing rig and or the material itself. My biggest advice for all of this would be to set up a default scene with all of these things so that you don’t have to reinvte the wheel every time. 

The process is simple, create some sort of plane that your model will stand on, without it will feel weightless. Shadows play a  big part in all of this. For this piece i chose to use a beveled plane to have a nice transition between the floor and the wall. All of this is optional, and you should know that you can add your own background later through Blender or Photoshop.

I like to start by first importing my asset into a blank scene and without moving it, simply position the camera to frame the object. I then add the lights around the model to make sure that they are working with the presentation. This process is the most time consuming because its all dependant on the model.As an added note, i often rotate the model while leaving the camera locked in place. In case i wanted to show another angle, i can easily just rotate the object and know with full confidence that it will look as dramatic as the last shot.

To view from a camera, you have to have a camera in the scene. "Crtl + Numpad 0" will make any camera the active camera. "Numpad 0" will change the view to that camera.

Lights Settings

During this process i also take some time to  play with lighting intensity and colors. Is helpful to isolate each light to see how the object is reacting to it. Below you may see what each isolated light is doing for the model.

As mentioned earlier, half of the time is spent trying different positions and values of your light. It helps a lot to find reference. Reference can come in the way of other artists renders, portraits, museum catalogs etc.  

It really does help during this process to isolate your lights. Having all the lights turn on at once all the time makes it very hard to dial down the settings you might be after.


Material settings

Materials in Blender can be built in two ways. You may set up the values in the "Settings Window", or go into the "Material Editor". I prefer to make the materials through the material editor.  All of the rules of pbr apply to blender materials. I will go ahead and explain the materials as an artist, and not a scientist, since to get the look you have to cheat a bit.

I used two materials on this render:

RenderHighPoly_mat -  which is the material assinged to Mic Mac. Ive set its roughness to a bit low to catch the highlights of the mesh.

Floor - This material has duller roughness than the last, trick here is to keep it shiny enough, but not reflectiive.

World- the world material is what the render would use if you had an hdri image plugged in. Since I do not, im using a very dark color so that the scene isnt in total darkness.

An additional note, is that the colors of your asset and floor does matter. Using different colors will bring contrast to your render.  

Render Settings

Below are my render settings for this scene. I am using cycles and have set the max samples to 10. This isnt a super intricate render so I didn’t think I needed to go higher than that. For the image itself ive set it to be 1500x2000.

Final Result

Below is the result from the Render Output window of Blender. And here is another piece ive been working using, using the exact same ligthing scenario!I hope all of this sheds some light on how you can render your models using Blender! Thank you for reading! 

Interview with AtmoVFX centered on Enviroment Art

General / 26 December 2023


Had the pleasure of sitting down with ATMO a few weeks ago and do a fun interview centered on Enviroment Art! 

Sculpting Techniques @ Voxel School

General / 03 June 2023

My visit to Voxel School in Madrid was an adventure from the start. As a first-time visitor to the city, I was captivated by its beauty, although I didn't have much time to explore due to my eagerness to spend more time at the school. Nevertheless, the few sights I managed to see were breathtaking. My journey began in Barcelona, where I took a cab to the train station before embarking on my train ride to Madrid. It was a day filled with excitement and new experiences.

For more info about voxel school please click here.

Upon arriving at the train station in Madrid, I was delighted to be greeted by Jesus Hidalgo ( Director of communications ), who kindly offered to pick me up and accompany me to the Voxel School Campus. The warmth and hospitality I received from Jesus and Blanca Mons (Director of Events and Communication)  were truly heartwarming.

Stepping onto the campus, I was immediately blown away by the impressive facilities. The entire environment exuded a vibrant and immersive game art school atmosphere. The campus boasted state-of-the-art facilities, all stylish and brand new. It was intriguing to discover that the classrooms were named after renowned artists and movies, adding a creative touch to the learning environment.
One of the highlights of my visit was the opportunity to meet the talented environment art students. I spent several minutes with them, providing quick critiques and feedback on their work. The quality of their creations was truly impressive, and I was struck by their humility and openness to criticism. Their good manners and hospitality were also greatly appreciated!

During our lunch break, I had the pleasure of meeting some of the other faculty members and founders of the school, who, like Jesus and Blanca, demonstrated a high level of respect, hospitality, and industry expertise. They were seasoned veterans in the Madrid gaming industry, and their insights were invaluable.

After a rejuvenating siesta, it was time to return to the school campus for a sculpting demonstration. This session focused on gradually building up assets in Zbrush to create a final sculpt. It was an enlightening experience, and I thoroughly enjoyed sharing my rock sculpting technique with a new audience.

To conclude the day, we gathered for a round table discussion with local talent, including Carolina Damian(Enviroment Artist EA, Joaquin Otazu (Studio Head de Secret 6 Madrid), Raquel Diaz Herreros(writer for news outlet El Mundo), and of course myself. The opportunity to engage with such passionate individuals further emphasized the unique and vibrant culture that Voxel School has fostered. It is undoubtedly a remarkable institution that I would wholeheartedly recommend to anyone starting out in the field or considering going back to school.

After the round table discussion, we had a delightful conclusion to the day with a small raffle. I had the opportunity to donate some personal items to the event, including a signed copy of JEDI SURVIVOR and a few extra items from God of War. It brought me great joy to see these cherished possessions find new owners among the lucky winners. The excitement and anticipation filled the air as the raffle unfolded, adding an element of fun and camaraderie to the event. Witnessing the smiles and gratitude on the faces of the winners was a rewarding experience, and it reinforced the sense of community and appreciation for gaming that was prevalent throughout the gathering. Congratulations to the winners of the raffle! 

The most significant aspects of this entire opportunity was the fact that I was surrounded by Spanish-speaking individuals at Voxel School. This provided me with a unique chance to reconnect with my roots and practice my native language, Spanish. It was truly a highlight of my visit. Interacting with the students, faculty, and other talented individuals in their native language allowed me to deepen my connection with the culture and further develop my language skills. The experience was not only enriching on a personal level, but it also added a profound layer of authenticity to my time at Voxel School.

In summary, my visit to Voxel School left a lasting impression on me. From the stunning campus to the dedicated faculty and talented students, the school truly stands out as a hub of creativity and innovation. I am grateful for the experience and the inspiration it has instilled in me.

Huge Thanks go out  my hosts, the students, my leads at Respawn. And most of all to my amazing girlfriend Yaza whose support motivated and empowered me to reach out to voxel school for this occasion!

Creating Presets with Houdini :: Part 1 Pebbles

General / 18 April 2022

Making presets can be one of those time-consuming tasks, and a necessary evil. I preferred not to spend too long doing just that, but also don’t want my work to suffer through the use of poorly made, low quality presets. This article is the first on  a series where I touch on how to use a combination of Houdini and zbrush to generate presets. Which can be used later on for multiple things such as: reused as insert multi brushes, alphas in substance designer, alphas in substance painter, base mesh for assets that could go in the engine, etc.

For this article, I will focus on how I  use Houdini SideFx to quickly break up an existing sculpt into smaller pieces. I do want to point that this article is meant for artist. And how artists could potentially start getting their feet wet by navigating the intimidating landscape of Houdini, to understand its complexity and come up with workflows that work for them! ( YOU!!! )

I also want to point out that the technical nature of Houdini makes it a dangerous program to use, since you can easily spend hours plugin nodes and not get the results you want. My advise is to have patience, and to remind yourself that if you manage to get something that looks half decent, you can always export it out and pick up the next step in zbrush. One of the easiest tasks anyone can do to gain  a good comfort level with Houdini is to use it to fracture objects. Something which can be tedious to do by hand. Houdini makes this process very fast and low time consuming. Below is the original brick, imported into Houdini from Zbrush.

The end goal is to generate this :

To later apply and use them here :

The steps to achieve this are listed below:

STEP ONE - Shattering your object:

  1. Import your mesh.

A) Create a file node, and point your obj within the file browser. ( after wards you can plug any other model to this file and houdini will shatter it for you!

B) Create a voroni fracture node, this is what will be used to fracture your asset. But it will need some sort of source points to know where it needs to shatter the object.

C) Create a scatter node. This node will make a bounding box of your object, and create randomly scattered points inside. Think of it as a cloud of points. This I what tells the voroni fracture where to break things.

D) You can use a explodedview node after the fact the offset each of the fractured pieces. 

STEP TWO - Refining your object.


This is where things start to get interesting. The end goal here is to quickly crank something out that you can  take back into whatever application you need, for whatever use. The voroni fracture node will result in very procedural, boring cuts. However, with a little bit of effort you can get more refined results, and of course the more time you spend the better things will look. 


Nodes often give you outputs in the form of groups. In the case of the voroni fracture, it will output a group to be able to select the fracture!


The steps to refine the edges of the voroni fracture are as follow.

  1. Create a connectivity node,     this will give each of the polygon islands created by the voroni node an     id. This idea will then can be used by a "for loop" to iterate     through each piece! Once we are inside the for loop, we can instruct     houdini to take a series of steps.
  2. In short we will set up a     boolean of an inflated mesh to be able to subtract the bevel. The end     result is seen below.

Below you can see that houdini will treat all the little edges in one go. You could refine further and add vop attribute nodes to add even more detail. I chose to leave it as is, so I can refine it in zbrush at a later time. 


You can use a delete node to isolate your favorite pieces and deleting the rest. The selection wont be procedural, so changes to the anything above this node will break your group and you will need to reselect the meshes. There are ways to make this even more procedural, except I wont be covering that on this article. 

Step three : Export the output!


At this point we take a similar approach as before and set up a for loop. This for loop will move each of the polygon islands floating in space to the origin, so that you don’t have to! This is done through the usage of expression within the transform node.


The power of houdini really comes to light once you mix out of  the box nodes with simple expressions. These expressions are found in the help documents for each of the nodes. Houdini is extensively documented, my advise is to read the documentation slowly and also open their content files to study how things were done.

Conclusion:

The entire setup up to this point took about thirty minutes. Once I completed these steps, I could go in and continue to refine the shards inside of Houdini. However, at this point it was much faster for me to bring the shards into Zbrush to refine by hand. Not only that, making chippies on a Sunday evening is soothing and relaxing. :)


Scattering in Zbrush :


Once the presets were ready. I created a multi insert brush, which then became a nanomesh brush and used nanomesh to scatter the objects on the ground.


In short, nanomesh is zbrush's scattering system. There are lots of great tutorials out there that cover how to use it, but ill give you a brief description of what I did.


Here is a tutorial that covers its basic usage.


#AskZBrush: “How can I apply multiple NanoMeshes to the same poly?”

Select the polygon you want to scatter the object on, tweak your settings to your liking. You can then create layers and have multiple objects assigned to the same polygon.


Once you like what you have you can convert the nanmomesh into a 3d mesh. And edit further by hand. 

Thank you for reading! I hope this was useful to you, and that it opens a world of possibilities for your upcoming projects. The source files for this project are found over on my gumroad page. Please donate and support me so that I can be more encouraged to make more articles like this! Also feel free to send me feedback! 

Big thanks to my beautiful partner,  Yaza without her support i wouldn't have the mindset to do any of this on the side. She truly inspires me!! And to my friend Chad Briggs for proofreading my article! Without him it would just be a bunch of gibberish! 

God of War Environment Pipeline Demo @ Voxel School ( Madrid )

General / 14 August 2021


This past May 2021, I had the honor of giving a 2 hour demo at the Voxel school in Madrid! Thanks to COVID it was streamed from Los Angeles, where I live, and the whole presentation is available in video form below. It is in Spanish, but im pretty sure that there is a nifty translator plugin somewhere.. I touch on how  I approached the for  the interior of the mountain elevator before the big dragon fight in god of war 2018! 


Here is the full presentation


You may download the power point presentation here.


Podcast Interview : Game Dev Discussion Ep #73

General / 14 March 2021

I had the honor to talk to Alex during his latest podcast last week. We talk about being a generalist and world building. My views on social media, and how it all ties to your portfolio and your own character. Super humbled to be a part of this. Hopefully more opportunities like this will open up so i can keep sharing more insights.


For now, enjoy!


Chippies #105

General / 08 March 2021

Demon souls stress me out, so i just decided to make pretty art instead. 


Chippies #304

General / 03 March 2021

Here is an olddie but goodie, quick sculpt i made over the span of a few nights a while ago. Inspired by a miniature i found of connan the barbarian.


Learning 2d animation

General / 22 February 2021

Recently i've been very impressed by the stuff people have been doing with Blender's grease pen. So i decided to give it a try. Here area some test.

My very first animation! 


Followed by a more cleaner, more traditional animation, this time using the "animator's survival handbook" as a guide as i read through the chapters.


Finally, since i had a nice blockout of the animation i decided to convert into a bouncy slime ball..why not?!